It’s almost Halloween!
My kids may be off at college, but they are still kids at heart. So, I decided to make them both treat bags and sent them off in the mail last week as a surprise. Both of them are deep into the first semester/quarter of their respective colleges. And, this is about the time when the thrill of being away at college wears off, and the hard work really sets in. I’ve noticed that their attitudes have become very serious lately, and they both seem a little stressed.
Well, it definitely lifted their spirits to get these treat bags! I got some very happy responses! Yeah!!!

I used some white bags I bought at the craft store. One trick I’ve learned over the years is not to try to stamp directly onto the bags. Unfortunately, the surface is too uneven, especially towards the top where the handles are attached. So, I measure out a piece of white cardstock the same size as the front of the bag and stamp on the cardstock instead. Then, I simply use Fast Fuse to adhere the cardstock onto the front of the bag.
For my bags, I used two stamp sets including the Layered Letters Alphabet to stamp “Trick” and “Treat” and the Bite Me photopolymer stamp set, which is available on the Clearance Rack for only $6.98! This is a great little Halloween set that I bought years ago, and it includes these great spider web stamps, as well as the little “or”.
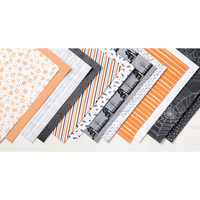
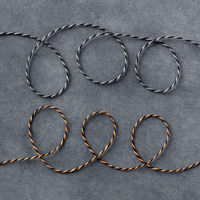
I finished decorating the bags with some Halloween Night Specialty Designer Series Paper. I love that paper!!! It includes the cute little haunted houses that I framed with Layering Squares die cuts. I also really love the Halloween Night Baker’s Twine duo. It’s just perfect for embellishing spooky treats!

Supplies used on my treat bags:


Hope you have a Happy Halloween!
